Playing without Pain
It’s a busy time of year; I recently finished a two week run with the ambitious Dell’Arte Opera Ensemble, and am now looking ahead to a new program of solo material I’m premiering in October. Add to that some aggressive student recruitment as the school year begins. All this activity creates a perfect storm of heavy demands on my mind, body, and schedule.
Managing these demands requires necessary physical care; yoga and exercise have proven to be the most beneficial to me for years. We’re all aware of the many benefits of both – what’s especially encouraging is that these benefits are attainable with relatively little time commitment. For a musician with a schedule that looks Pollock-esque in nature, an efficient routine for physical care is imperative.
But what works best for musicians? A routine that caters to our unique physical demands is the single most important factor in maintenance and injury prevention. Violinist and yoga instructor Bridgid Bibbens has put together a sequence of stretches and leads a class titled “Playing without Pain – Yoga for String Players.” Her sequence focuses on healing and preventing injuries for musicians, especially violinists and violists. If your playing creates strain in your upper and lower back, neck, shoulders, arms or wrists, then these stretches will benefit you as well.
I thank my lucky stars she was kind enough to share the sequence with me. I’ll use it during particularly gnarly stretch of long rehearsals and practicing, or whenever I feel a little tighter than normal. The whole sequence takes a whopping 15 minutes, 25 if you take your time. The stretches are a beginner level and easy to remember. What’s so remarkable is that if I practice them daily during a heavy playing-spell, I’ll endure NO pain. In all my years as a musician I didn’t know that was even possible. On top of the obvious physical relief, the mental uplift of not having to play in pain (or discomfort) expands my ability to concentrate. In short, it makes me a better player – able to take on more work at a time, able to execute that work at a higher level. To say the least, thank you Bridgid!
With her permission I’ve included the sequence below. For a downloadable version, click here.
Check out Bridgid’s music and, if you’re in the Austin TX area, her yoga classes – she’s an inspiring soul of many talents.
Tadasana: Mountain Pose

Stand with the feet together, or slightly apart. Balance your weight equally on both feet. Lift the kneecaps to engage the quads. Draw the navel in and up, towards the spine. Softly pull your shoulder blades together on the back, opening through the collarbones, and spin your palms forward. Draw the chin down and back slightly, lengthening the neck. Allow the crown of the head to float atop the shoulders. Breathe deeply, equal inhales and exhales, or to further calm the nerves, lengthen the exhalation.
Virabhadrasana II: Warrior 2
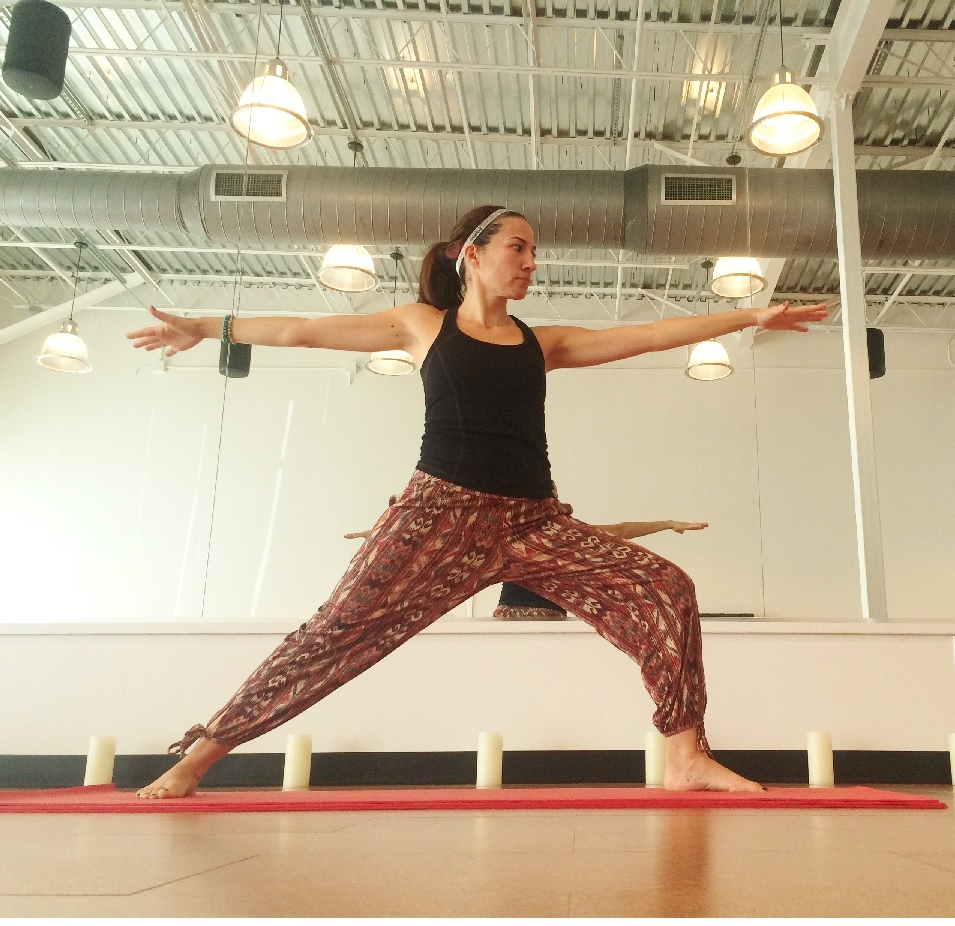
From Tadasana, step your feet wide apart, and turn one toe towards the short edge of your mat. Notice how your hips open towards the long side of the mat. Lunge into that foot, bringing the knee to a 90º angle without extending the knee in front of the ankle. Press equally through both feet. Extend your arms long, like you’re being pulling in two opposing directions. Allow the head to float, and turn the head toward the front foot. Soften your gaze over your front middle finger. Breathe deeply for 5 breaths, then switch sides.
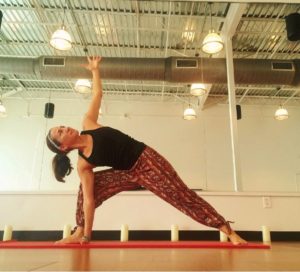
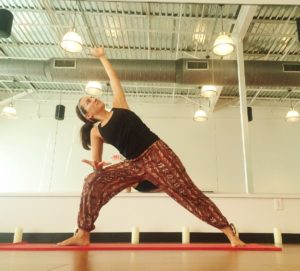
Viparita Virabhadrasana: Reverse Warrior

From Warrior 2, flip the front palm to face the sky. Reach forward, then up, maintaining the lunge in the front leg. Allow the back arm to drape down the straight leg, or wrap it behind your low back, eventually wrapping it into your front inner thigh, like you’re putting your hand in your front pocket. Keep pressing through the ball mound of the front foot to help deepen the side stretch. Hold as long as you’d like, 1-5 strong breaths, then transition into Side Angle (below).
Utthita Parsvakonasana: Side Angle


From Reverse Warrior, reach the top arm down to the earth, planting the palm on the inside or outside of the front foot (1st pic). If you can’t easily reach the floor, place the elbow or the forearm on the thigh (2nd pic). Spin your heart open to the sky and reach high and long with your other arm. Option to extend the arm over the ear, reaching toward the front of the room. It also feels nice to take some big circles with the arm here, juicing up the shoulder joint. Repeat these poses after Warrior 2 on both sides.
Prasarita Padottanasana: Wide Legged Forward Fold

From Side Angle, come back to wide-arms Warrior 2. Straighten through your front leg and pivot your front foot so that it’s parallel to your back foot, then turn the toes slightly inward and your heels slightly outward. Clasp your hands behind your low back and try to seal the palms of your hands together. If this is tough on your shoulders, hold a strap or towel between your hands. Inhale to reach the knuckles to the earth as you open your heart to the sky, and then hinge at the hips, allowing the crown of your head to release toward the earth. Let go of any tension in the head and neck and breathe deeply, creating more space in the spine on your inhalations and folding into that space on your exhalations. You can stay here as long as you’d like, maybe releasing the arms to the earth and swaying the hips side to side, reaching the arms between the legs to deepen the fold. Make sure not to clench your jaw or forehead. Keep your face and shoulders soft. When you’re ready to come back up, bring your hands to your hips and come up slowly with a long, flat spine. From here, transition into Trikonasana (Triangle).
Trikonasana: Triangle
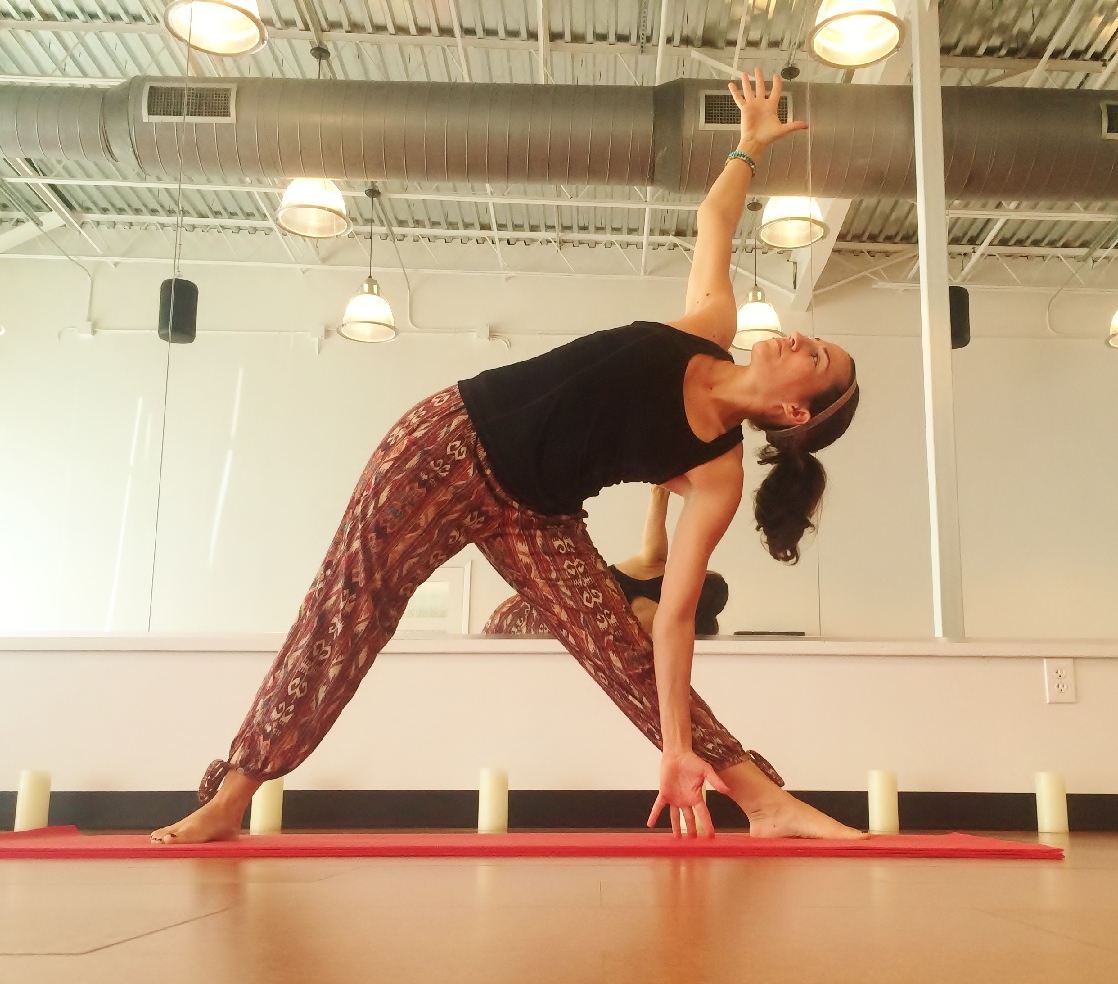
Once you’re up from wide-legged forward fold, pivot one toe outward toward the short edge of the mat. Open the arms wide, as in Warrior 2, and reach forward over the front leg as you steer your hips back in space. When you can’t reach any further, tick-tock your arms to 12 & 6:00, lengthening through both sides of your ribcage and spinning your heart open to the sky. Stack one hip on top of the other and one shoulder on top of the other. Your bottom hand can come to the earth or your shin, but be sure not to collapse your weight into the bottom arm/shoulder. Hold for 3-5 breaths, then use your core strength to draw you up to standing. You can reverse the triangle here, if you’d like, stretching from the front toe all the way through the front middle finger. Repeat this on the other side.
Adho Mukha Svanasana: Upward Dog

Lay on your belly, toes untucked so that the tops of the feet are on the floor. Plant your hands directly under your shoulders, next to your chest. Pull your heart forward and peel the chest and belly off the mat, lifting the hips, thighs, and knees as well so that only the hands and tops of the feet are touching the earth. This is a back bend, but requires lots of upper body strength. Be sure that you’re pulling forward, and not crunching your weight into the lower spine, which will create or exacerbate any low back issues. If this is too intense, another option is low cobra, where you use only your back strength to pull your heart forward and chest off the mat, with little to no weight in the hands. The lower body will stay pressed into the mat. You’ll still get the same back opening and strengthening benefits, and you can eventually work your way up to upward dog. In both upward dog and cobra, be sure to continue opening through the heart, drawing the collarbones open and the shoulder blades together on your back.
Nagani madasana: Cobra “dips”


After upward dog/cobra, lower your belly back to the floor. Widen the hands out from the chest, so that you can bend your elbows and tent up your fingertips. Inhale to peel the chest off the earth, and on an exhale, dip one shoulder towards the center of your mat, gazing under your opposite elbow. Inhale to come back through center, and exhale to the other side. You can repeat this as many times as you’d like, and then press back into downward dog.
Adho Mukha Svanasana: Downward Dog

This pose is used as a resting pose in a flow-based yoga sequence, but it’s quite a lot of work and very strengthening, increasing flexibility at the same time. From your belly, press up into a plank (top of a pushup) or to a tabletop position on all fours.
Baddha Virabhadrasana:
Humble (or Devotional, or Bound) Warrior


From downward dog, inhale deeply while you lift your leg high, with the option to bend your knee and open your hips. Step the foot between your palms on the exhale, and then inhale and come up to standing, raising your arms overhead. Then reach the arms behind you and clasp your hands behind your back. Try to seal your palms together and straighten your arms, then inhale as you reach the knuckles toward the earth and open the heart to the sky. On the exhale, bend forward towards the inside of the front knee. Release the crown of the head toward the earth. Sometimes it feels nice to bring your torso way inside the thighs, over your pelvis, and then nestle your shoulder and torso even deeper inside the thigh. Hold for 3-5 breaths, then inhale to release the grip and bring the arms back overhead as your torso comes upright. On the exhale, frame your front foot with the hands, step back to downward dog, and switch sides.
Shoulder stretches

Not sure if this one has a name…
Lie on your belly with your arms open to a “T”, palms face-down on the earth. Look towards one thumb while you roll towards the opposite arm. Lie on your side, using the hand you were gazing at for support. To intensify, you can bend the top knee and place the foot behind you. If you want even more, you can bend both knees, placing the feet flat on the earth.
Garudasana: Eagle (arms only)
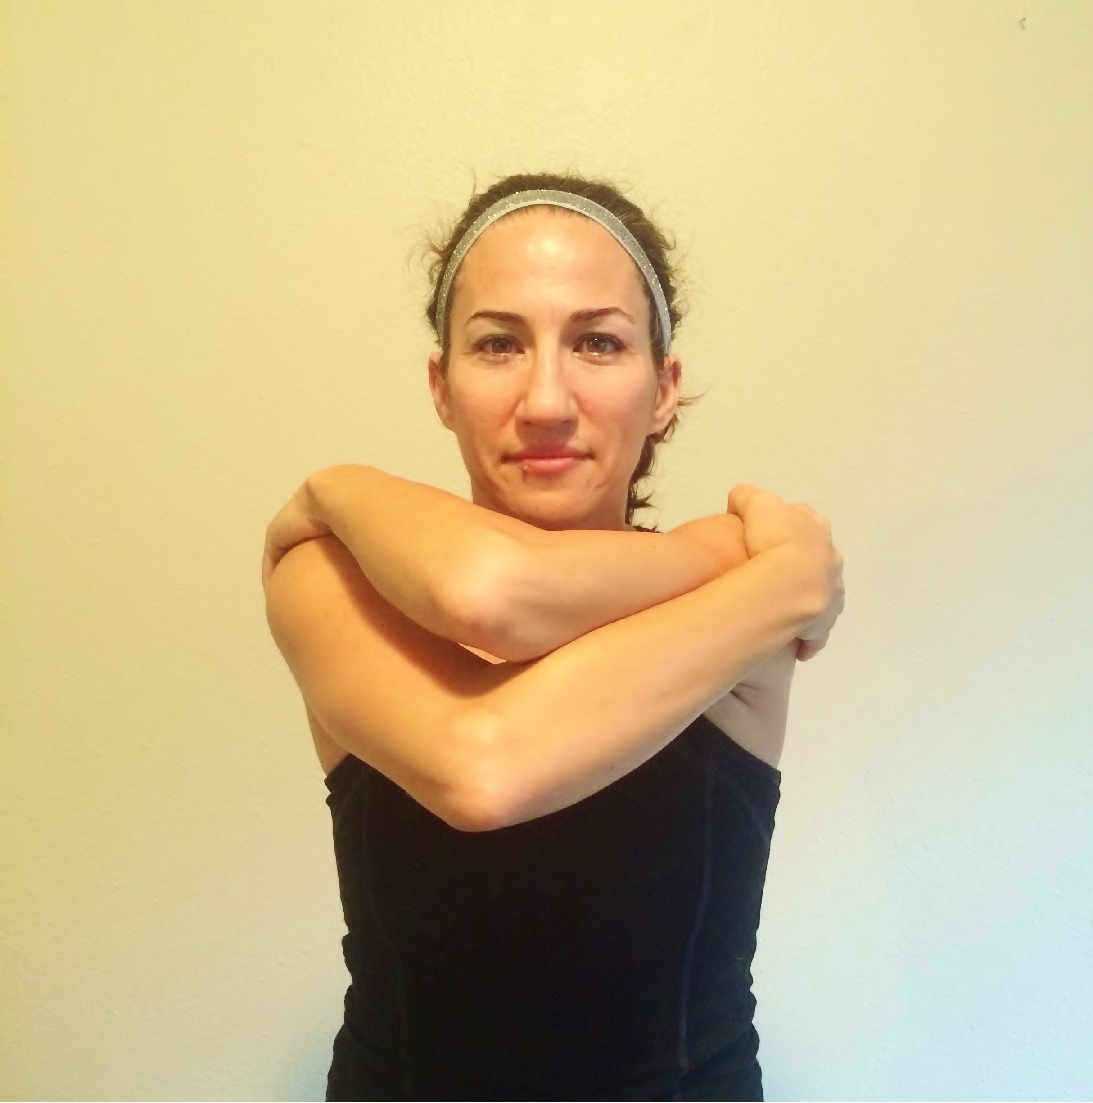

There are two options to help open up the shoulder girdle as well as the upper back. Wrap your right arm under your left, grasping opposite shoulders. If your back isn’t too tight here, you can intensify by wrapping the forearms around each other twice, maybe even touching your palms together, with the fingertips actively pointed towards the sky. In either variation here, lift the elbows so that the upper arms are parallel to the earth. In the forearm-wrap variation, open the forearms away from your face to deepen the stretch even more. Breathe deeply here and hold for 5-8 breaths. Release and gently shake out the arms before switching sides.
Gomukasana: Cow face pose (arms only)
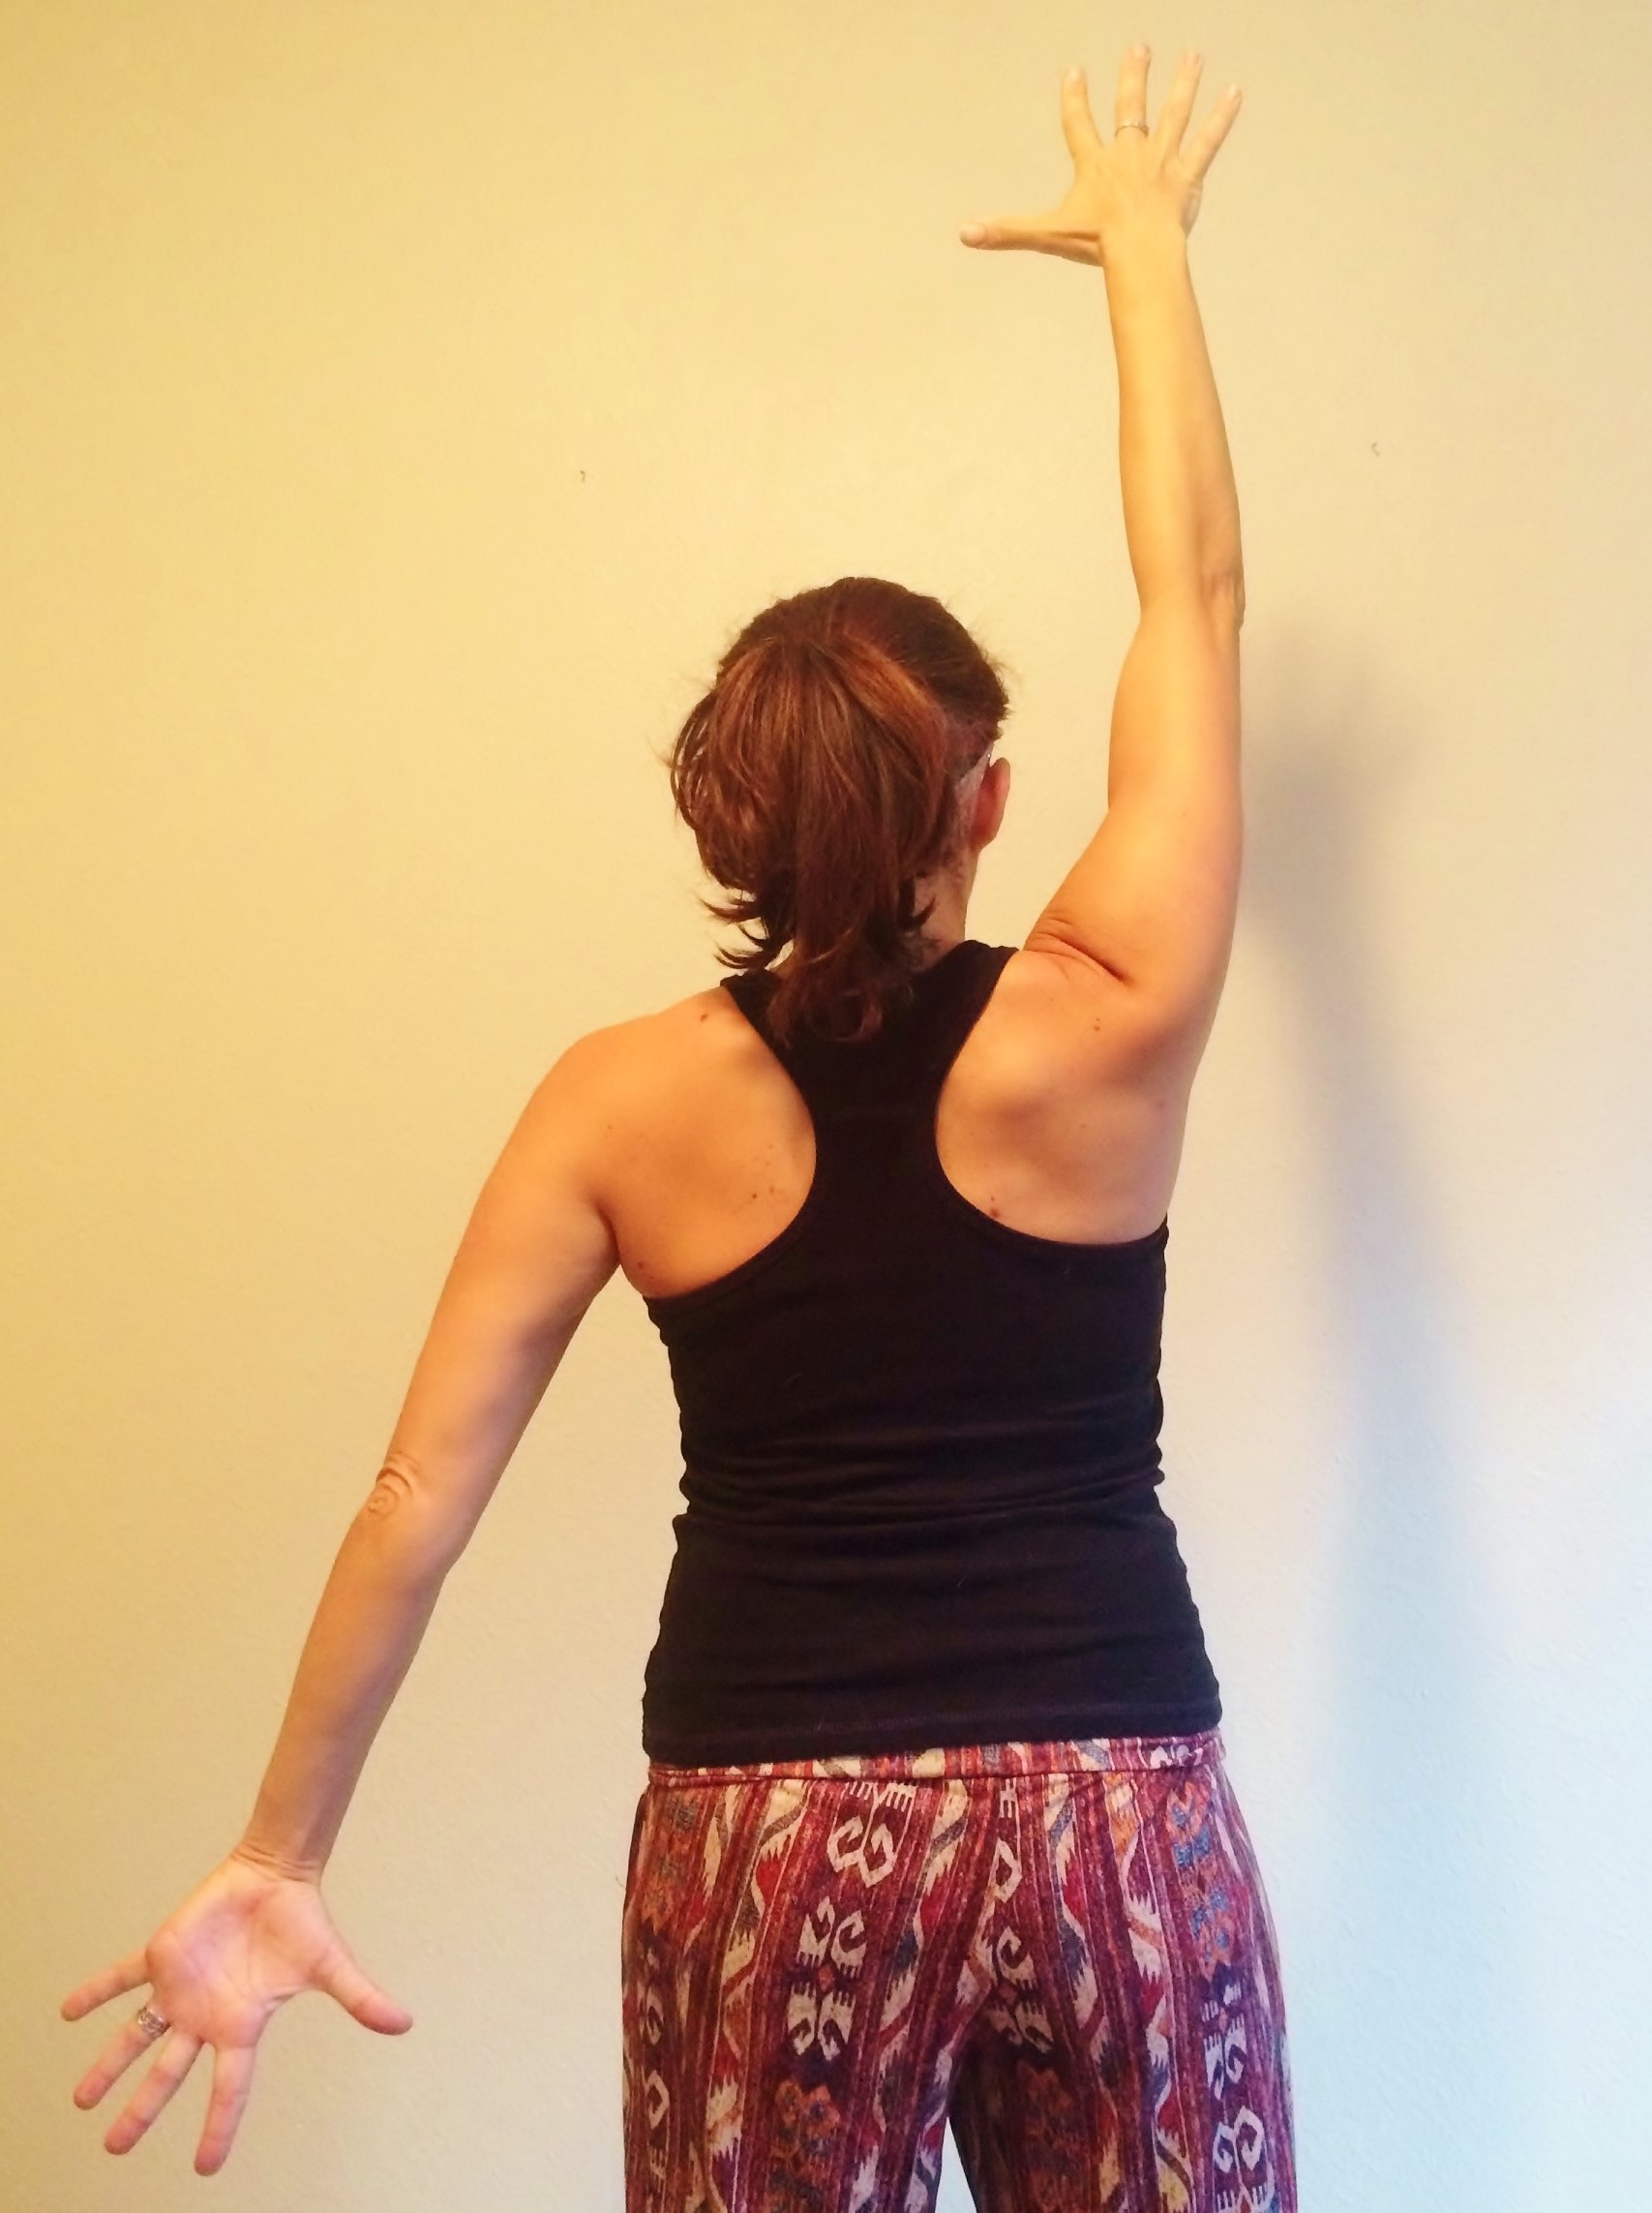
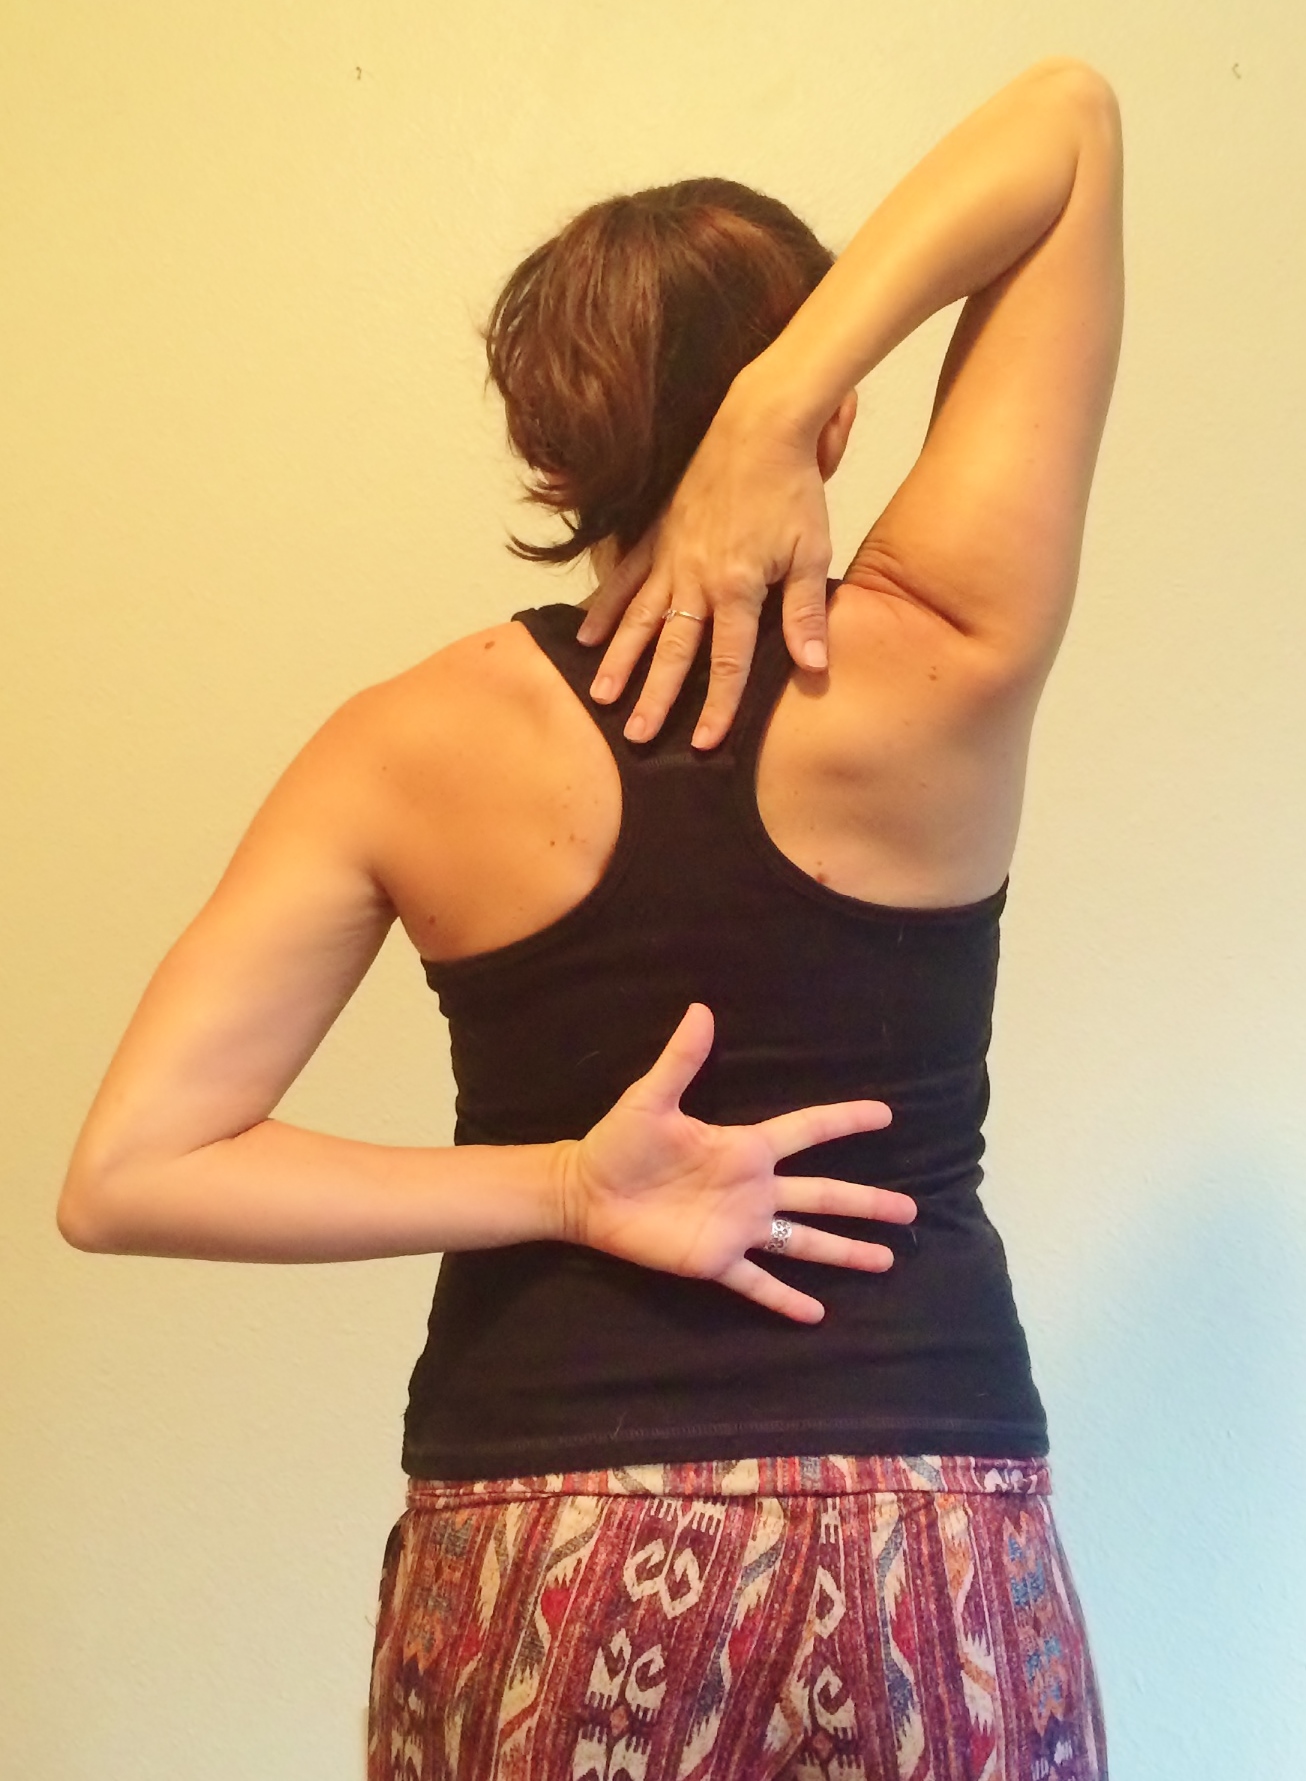
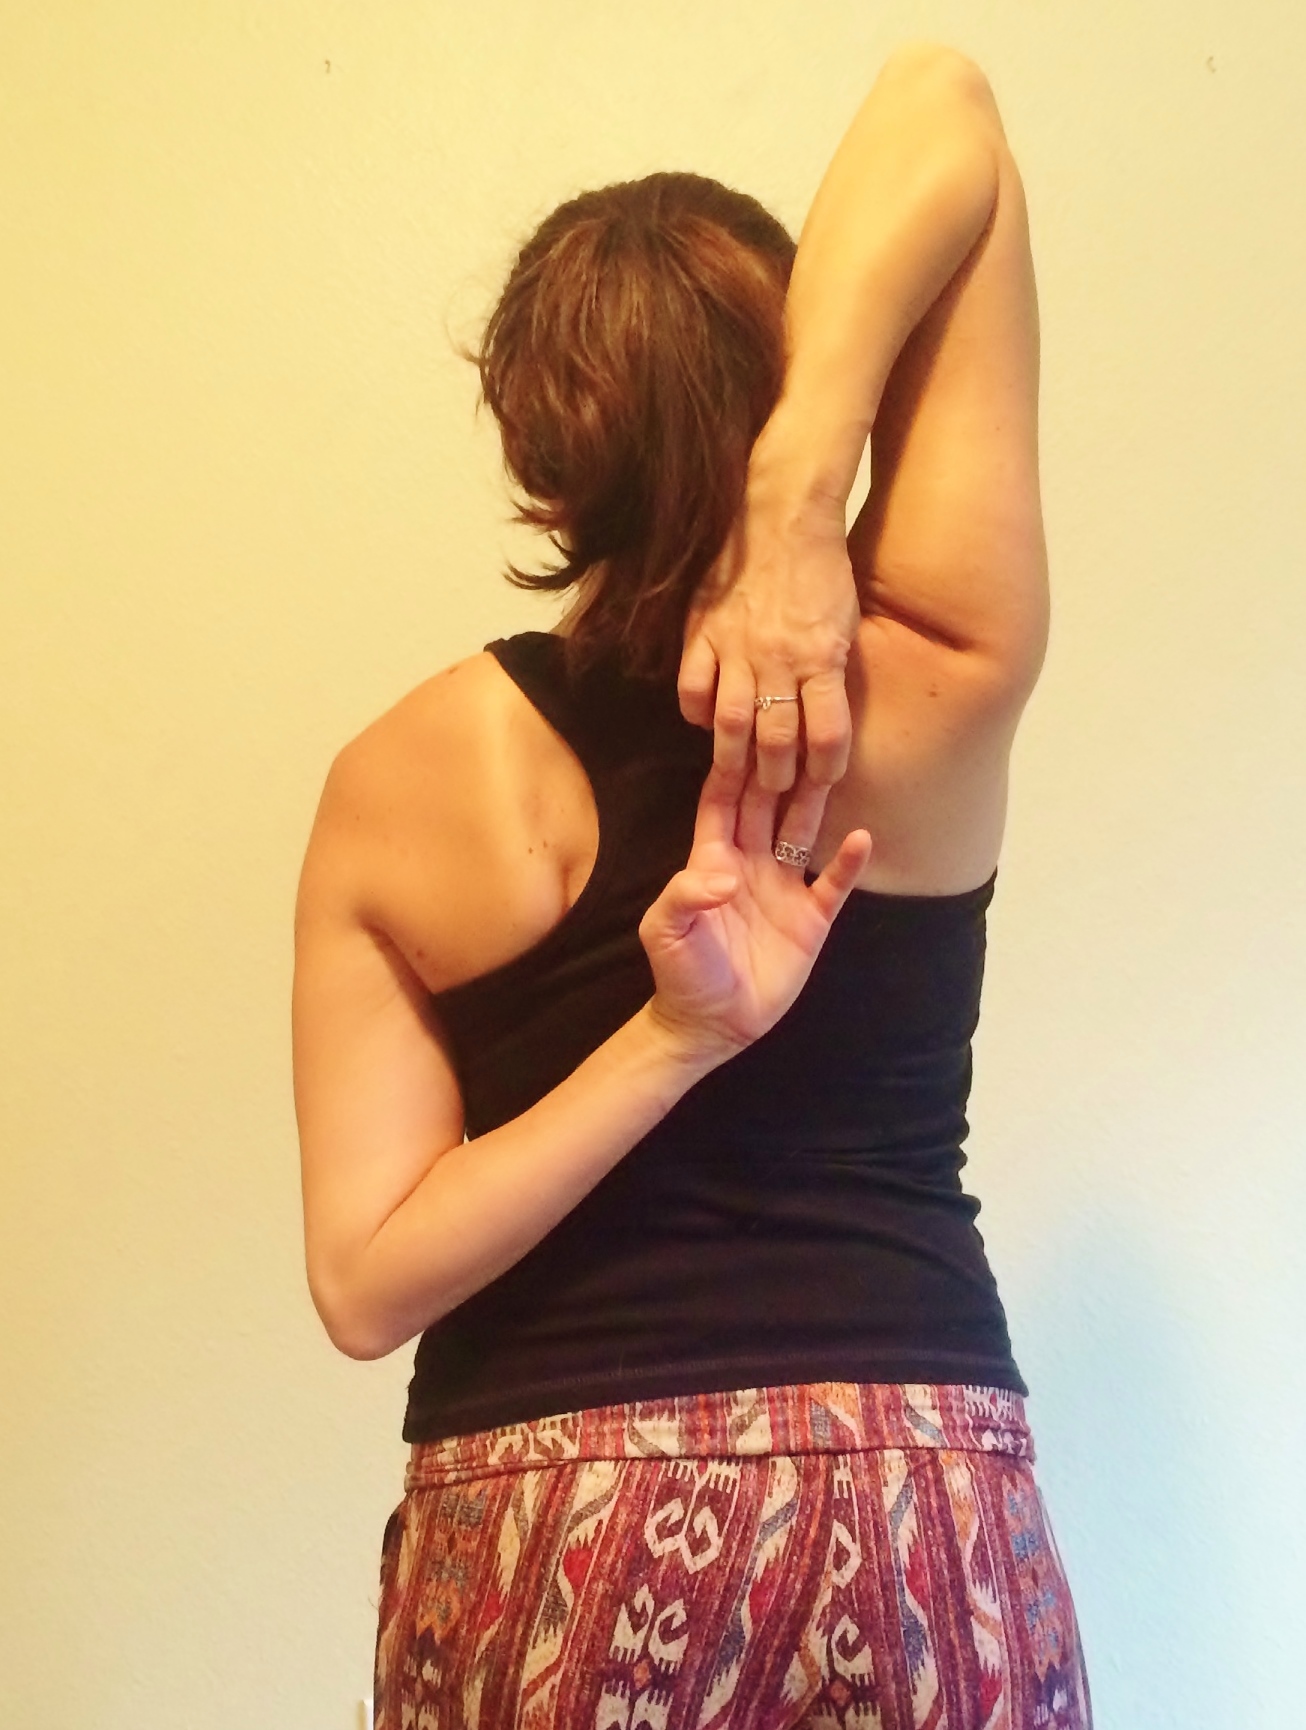

On an inhale, raise your right arm overhead, palm facing forward, and extend your left arm to a 45º angle, palm facing backward. On the exhale, bend both elbows, tucking the left arm behind the low back, palm away from the back, and the right hand to the top of your spine, palm against your back. Crawl your left hand as high on your back as you can and the right arm low, aiming to meet the hands in the center and grasp the fingertips. If your hands are not in the mood to touch each other, you can grasp a towel, strap, or even your t-shirt to deepen the stretch (last picture). Hold 3-5 breaths, then gently release, shake it out, and switch sides.
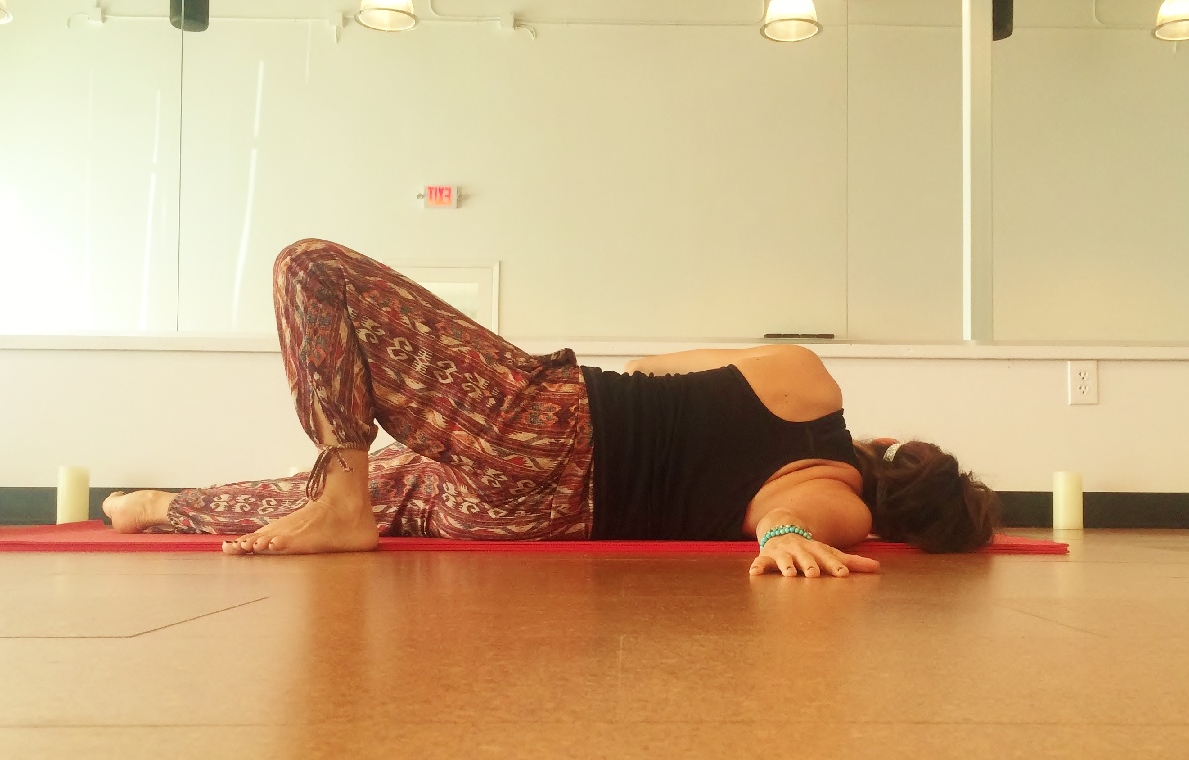
Supta Matsyendrasana: Reclined Spinal Twist

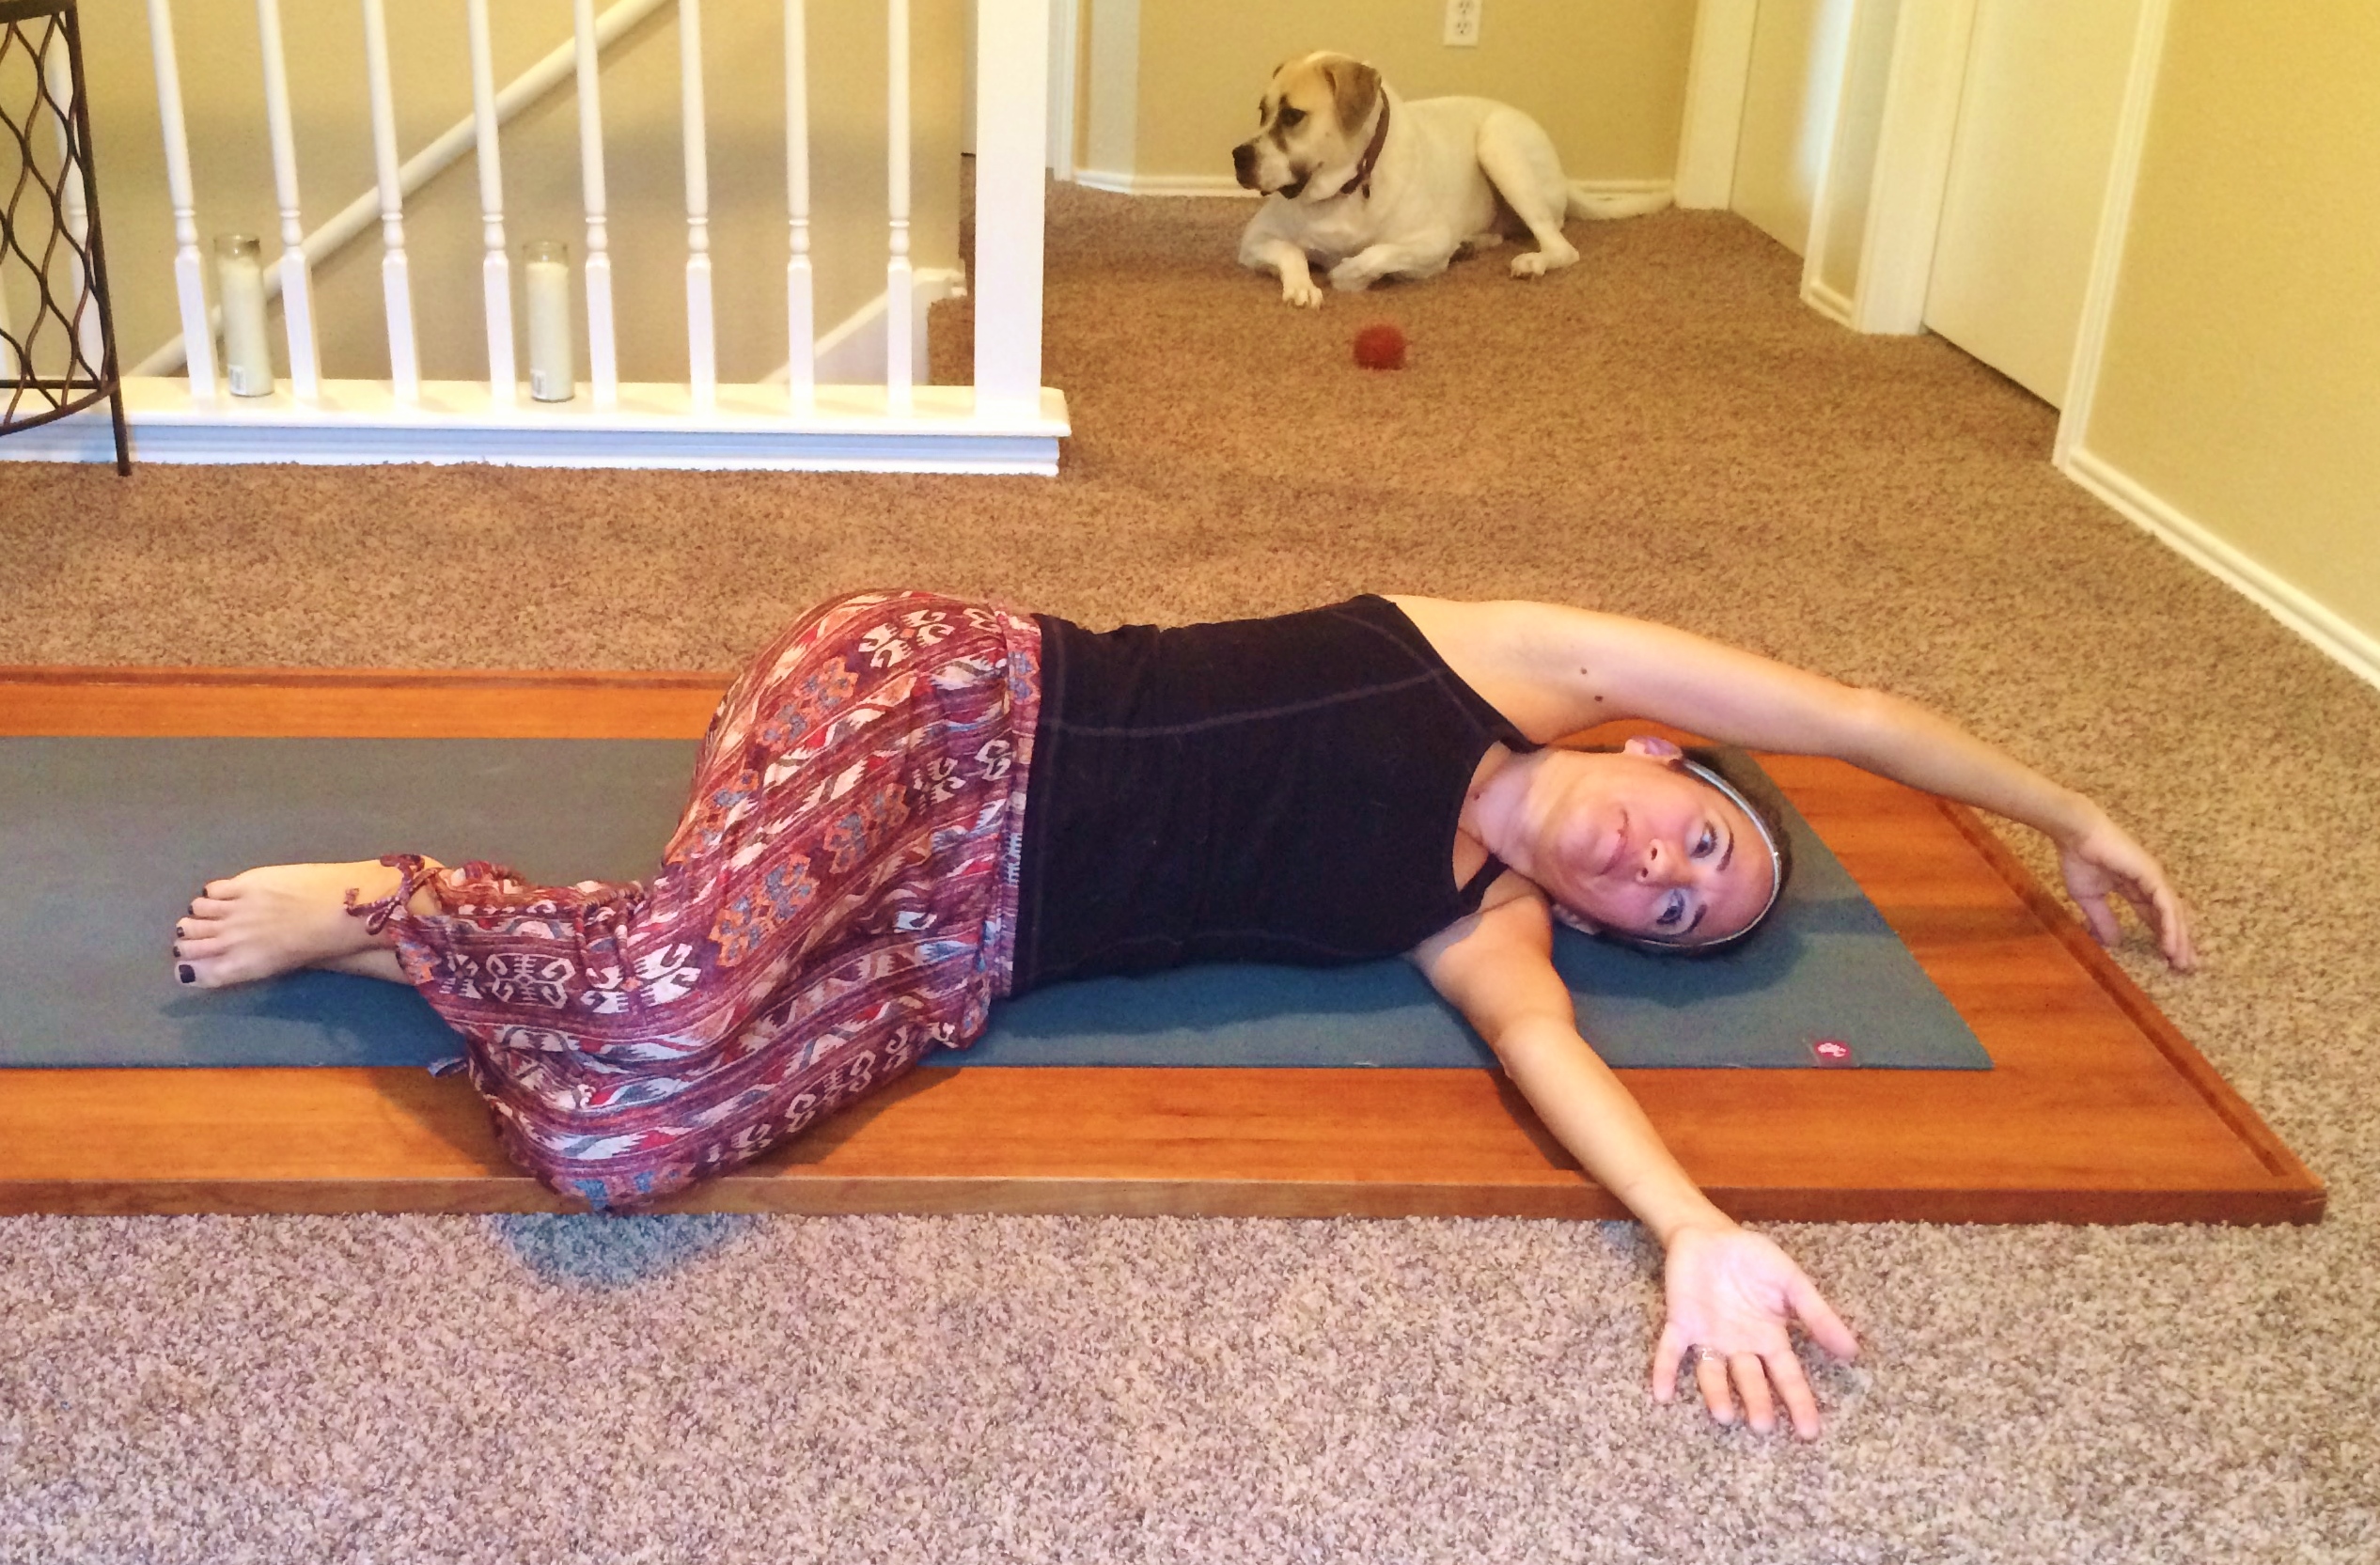
There are many variations of reclined spinal twists, but this is my all-time favorite. Lie on your back and raise your knees above your hips, with the shins parallel to the earth. Open your arms to a T, then gently drop your knees over to the right, trying to keep both shoulders flat on the earth. Clap your left hand on top of your right, keeping the arms straight. Trace a rainbow overhead with your left fingertips, trying to keep full contact with your fingers on the earth, opening the arms back out to a T. Your gaze can follow your left hand if it feels okay on your neck. Close your eyes, breathe deeply, and let gravity do all the work here. After 5-8 breaths, draw your head and then your knees back up to center and repeat on the other side.
Ananda Balasana: Happy Baby
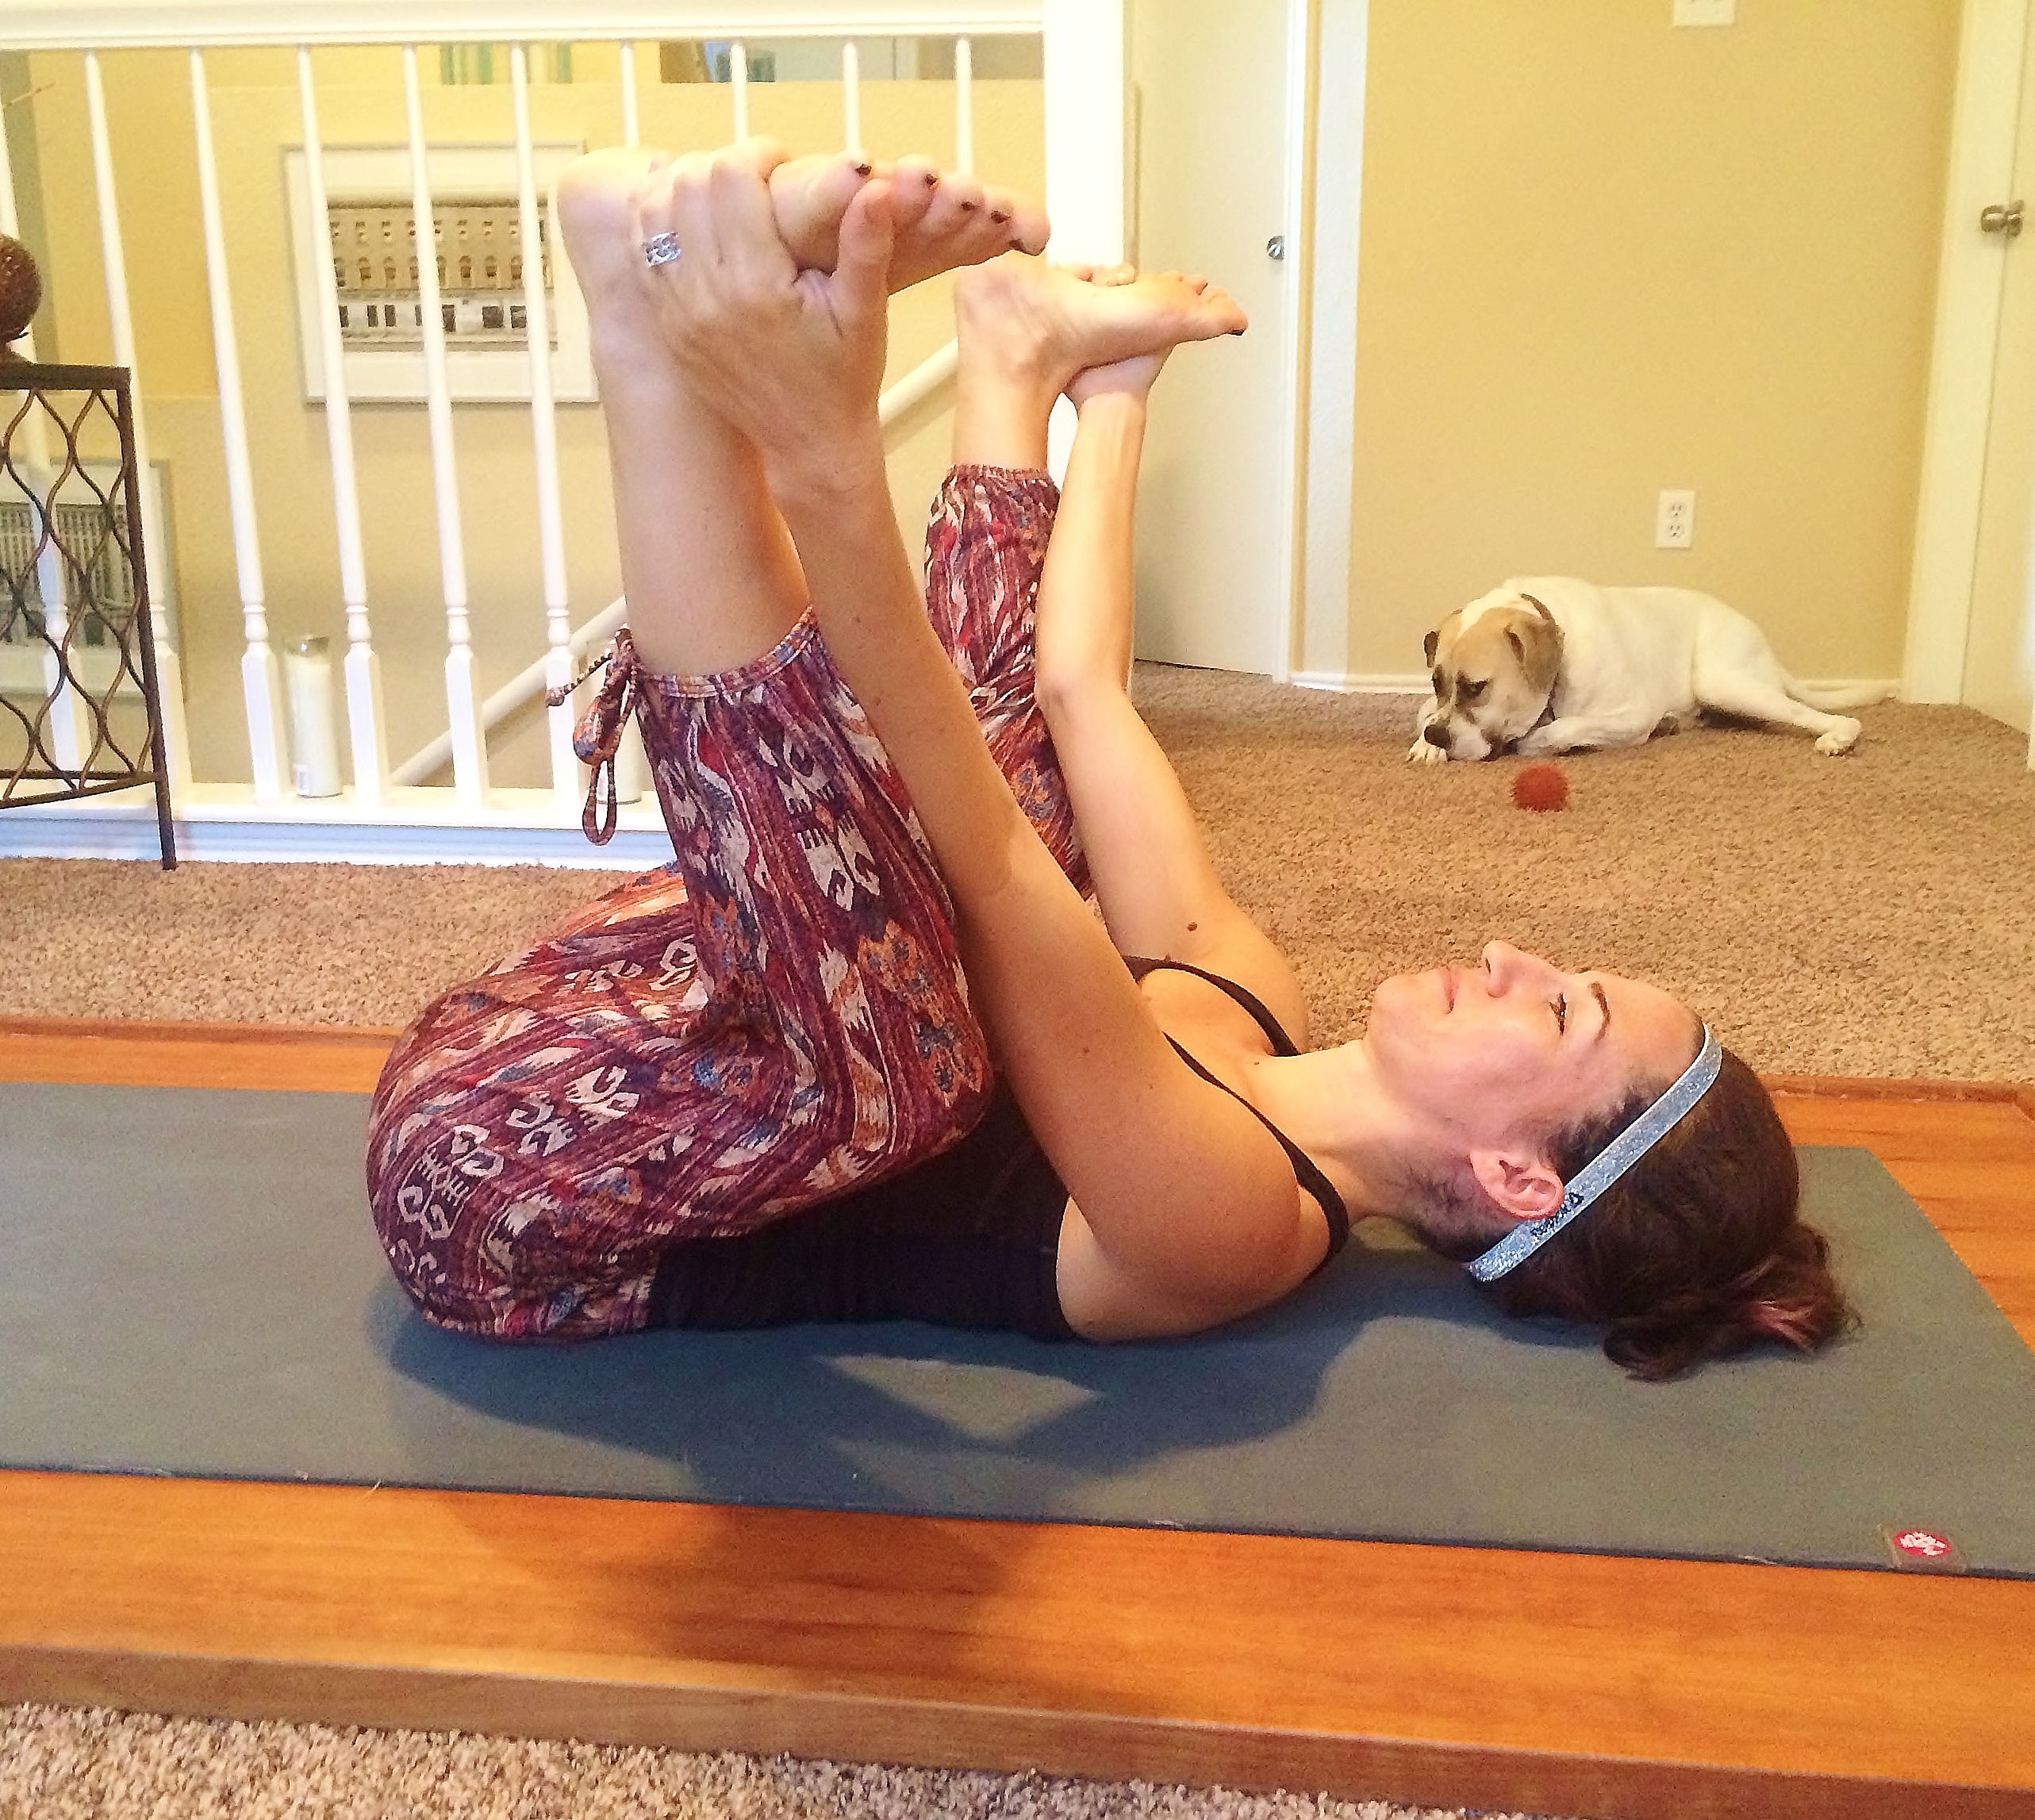
Some people refer to this is dead bug pose, which is just not pleasant. Much more fun to think of it as happy baby, and move in it the way a happy baby does when he or she is just beginning to explore movement in their own body! Hug your knees into your chest, keeping your low back on the earth. Reach between your knees and grab the edges of your feet. You’ll get a slightly different sensation from grasping either the inside or outside edges of the feet, so experiment with what feels best for your body in the moment. Then pull the knees towards your armpits. You can relax in stillness here, or rock side to side, or extend the legs longer. Just play with your body the way a baby does, exploring and moving and feeling good.
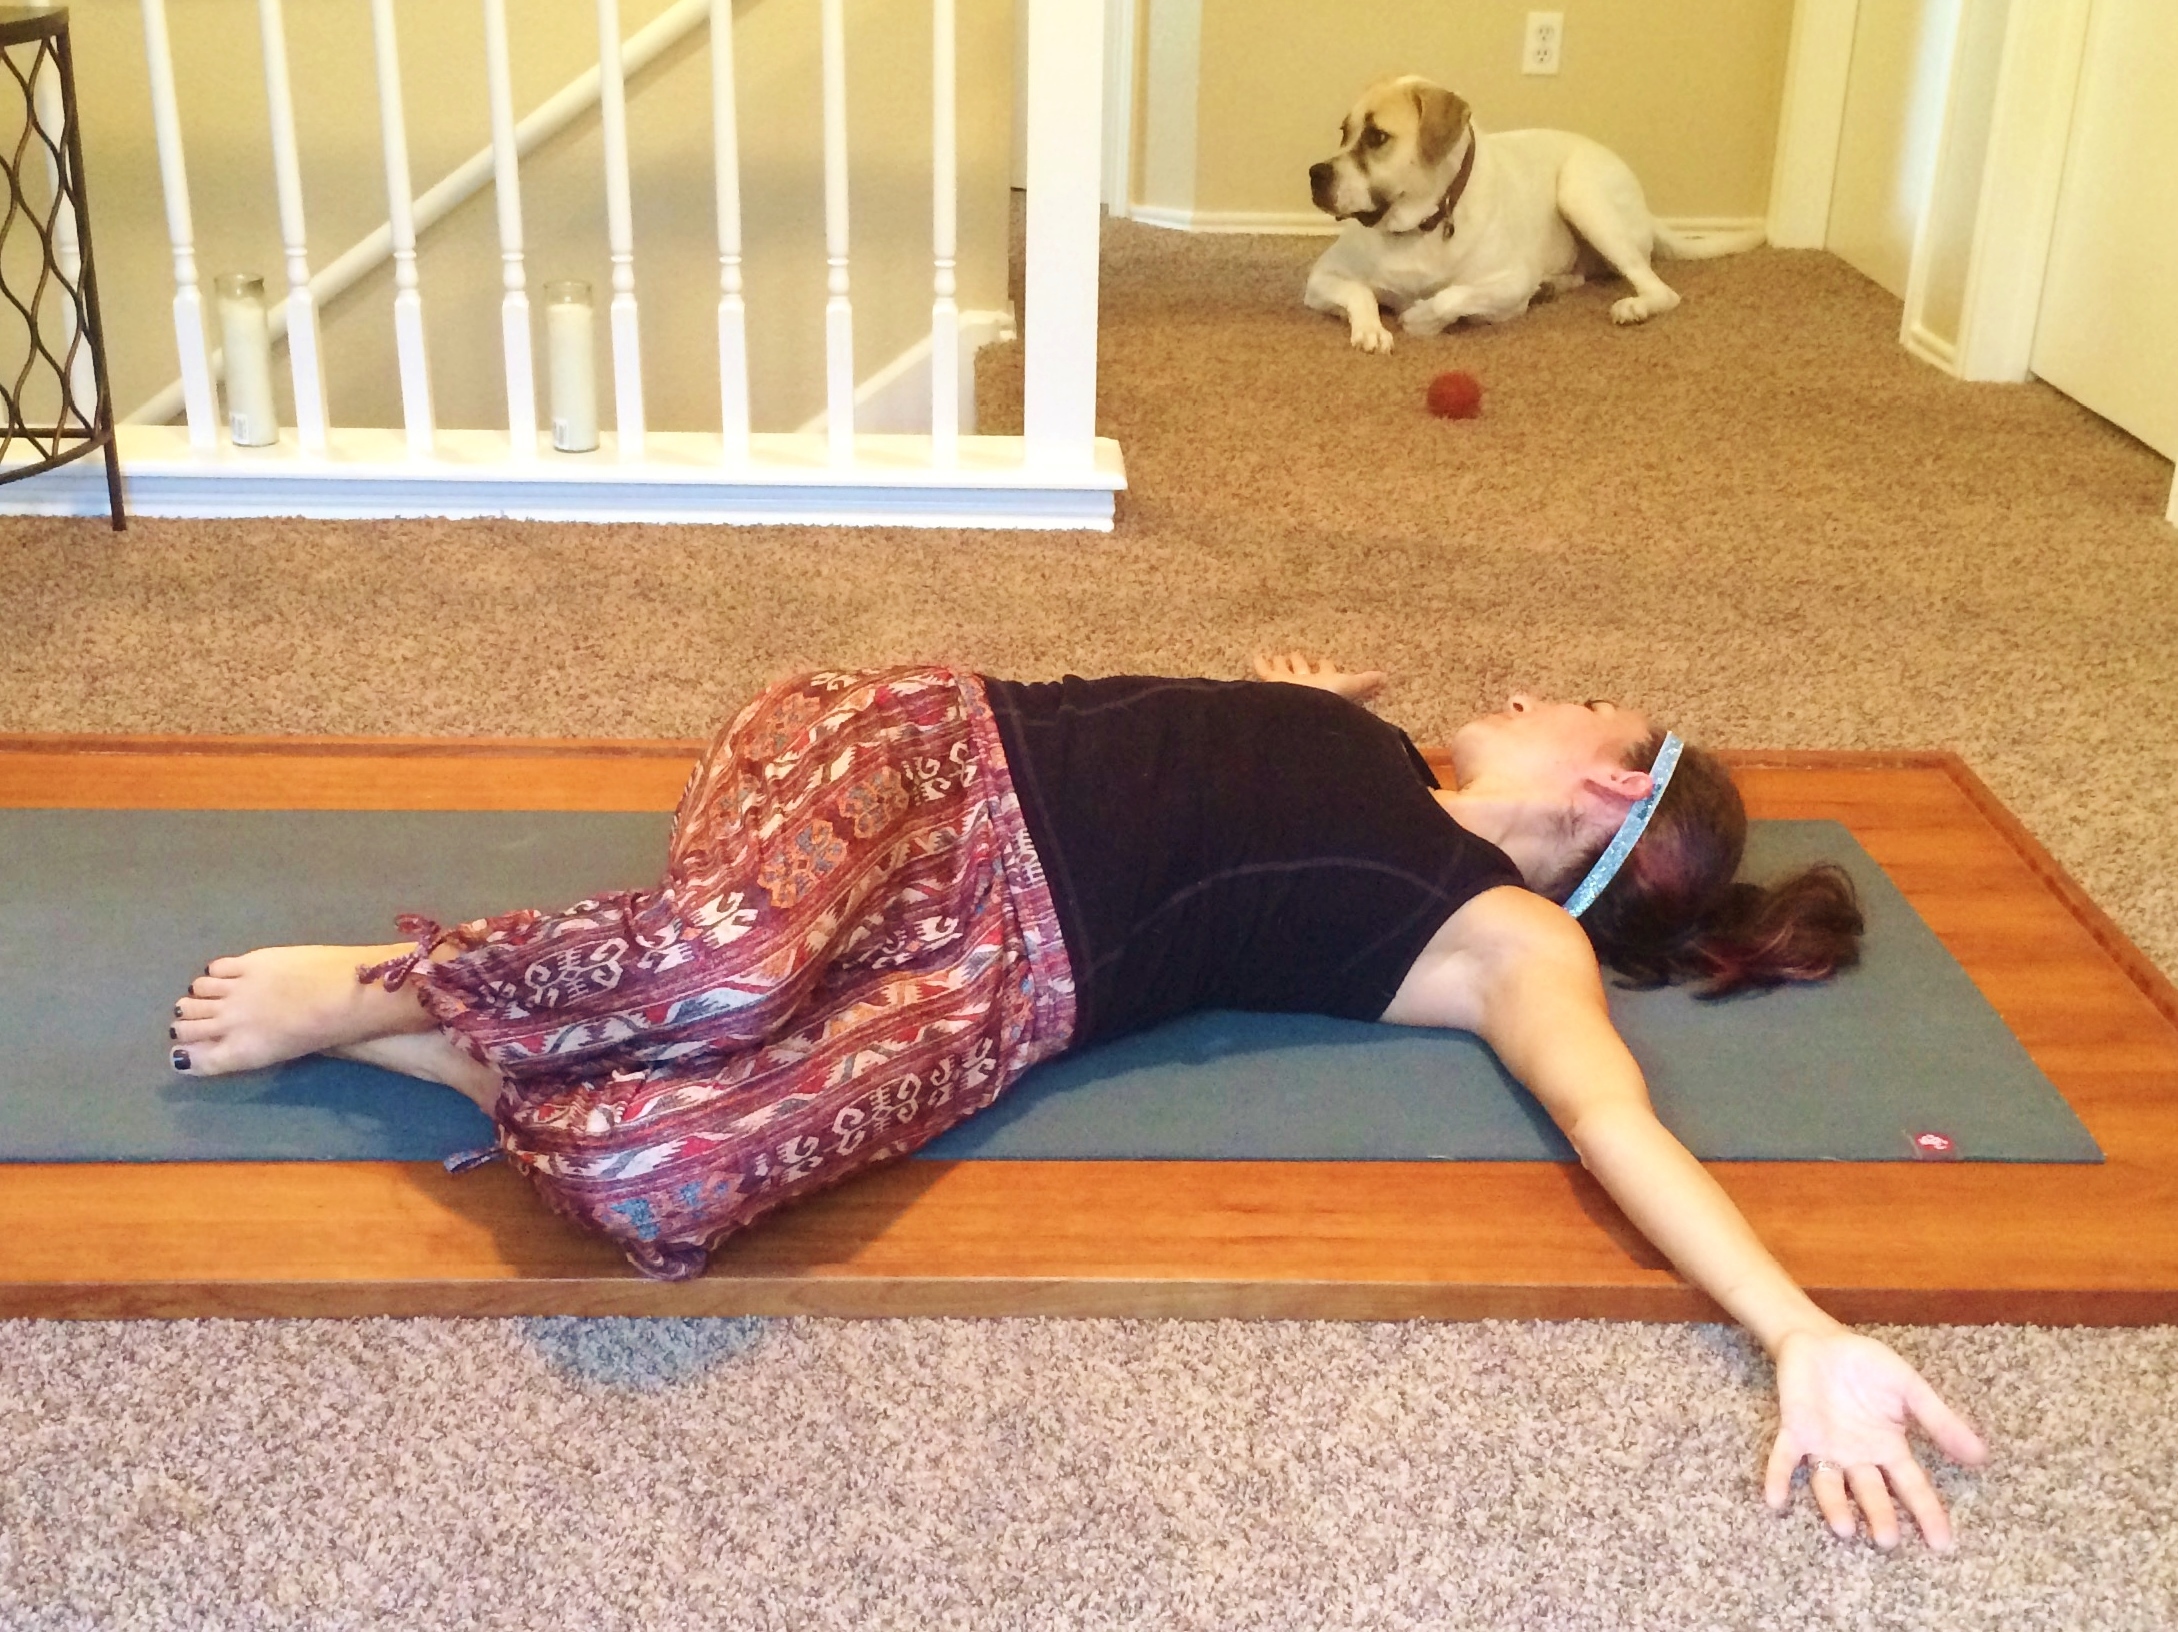
Savasana: Corpse Pose

This is the most important and often most challenging of all of the yoga poses. The final resting pose is necessary to allow the body to integrate the work you’ve just done. Lie on the back, legs and arms a comfortable distance apart from the body, allowing the feet to flop out to the sides. Release all effort and tension. Once you’re comfortably in place, take a super deep breath through the nose and exhale, sighing it out through the mouth, then completely surrender control of your breath. Notice any tension in the micro-muscles of the face and the top of the head. Let it go. Release the jaw, keeping the teeth slightly apart. Allow your thoughts to pass through without attaching any inner monologue to them, just watch them float on by. Stay here for 3-5 minutes, or even longer if you can. When you’re ready to come out of savasana, gently deepen the breath, bring small movements to the fingers and toes, roll the ankles and wrists, and reach long overhead, taking a nice easy “good morning” stretch. Slowly roll up to a comfortable seat with the eyes closed and take a few more focused, easy breaths. Notice how you feel. Take this calm, focused mind, relaxed body, and renewed energy back into the practice room or onto the stage!